You are currently viewing Cisco IOS Secure Gateway Deployment with CA Signed Certificates – Part 3 (SIP TLS)

Cisco IOS Secure Gateway Deployment with CA Signed Certificates – Part 3 (SIP TLS)

Introduction

In the previous posts we setup the PKI infrastructure needed. This post assumes that you’ve already created a trustpoint and installed a certificate on your Gateway (from Part 2), and also added the CA Root Certificate to CUCM (from Part 1).

In this post, I cover setting up the SIP Trunk from the CUCM and Gateway side, and enabling TLS and sRTP.

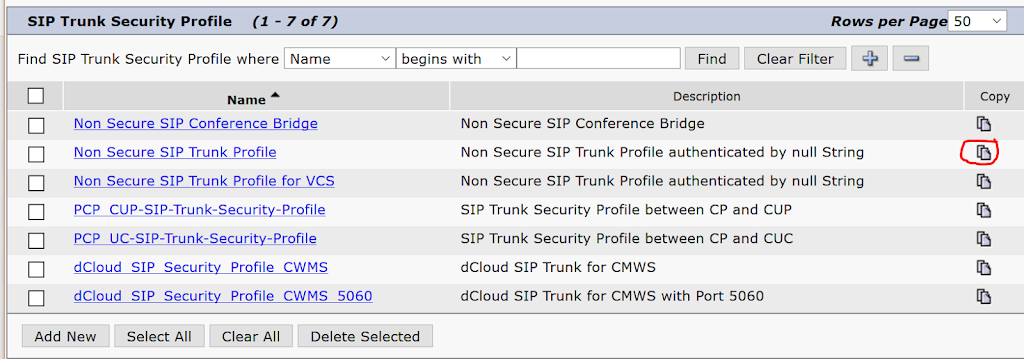
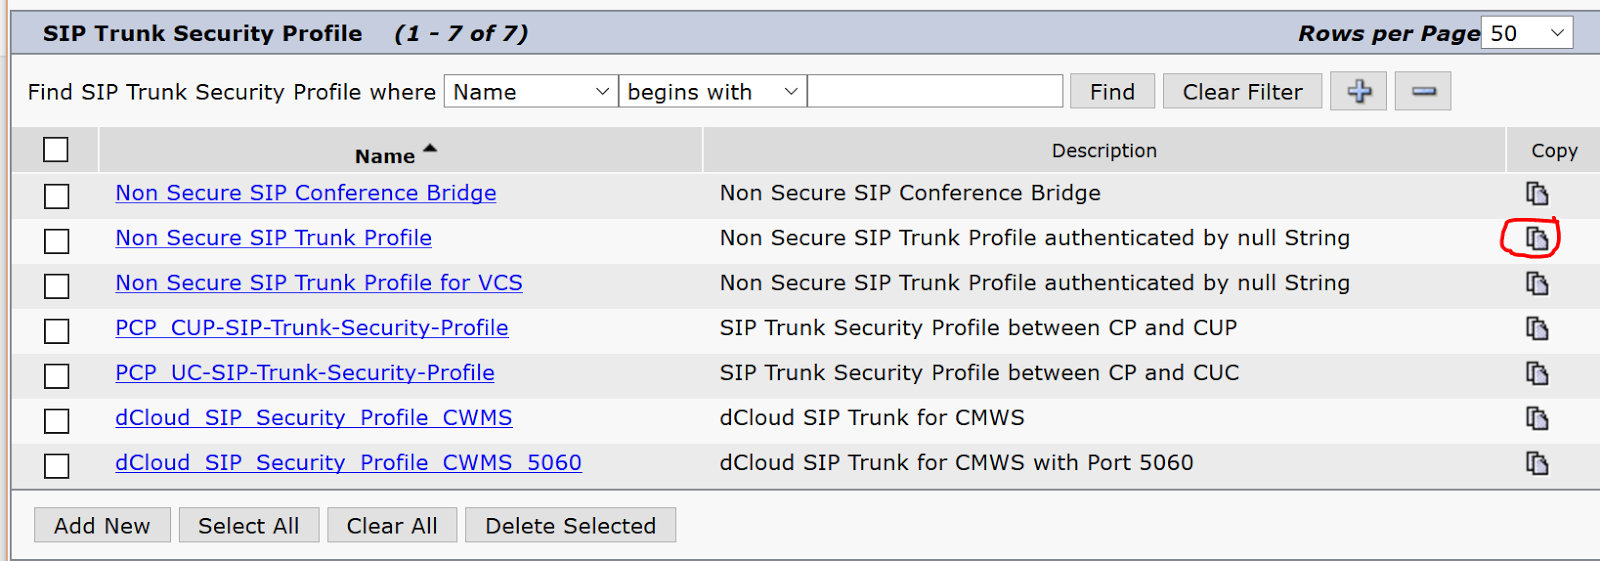
Create SIP Trunk Security Profile
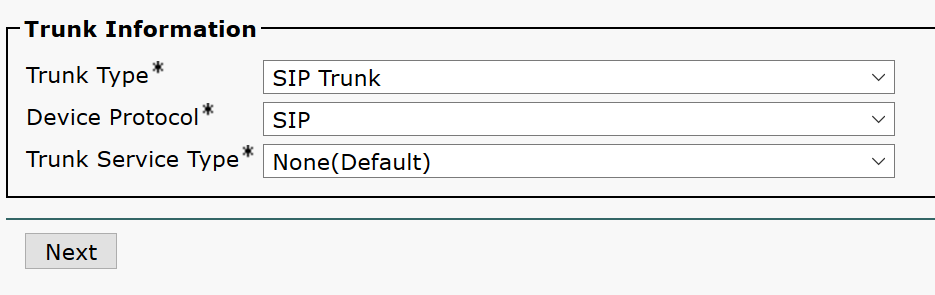
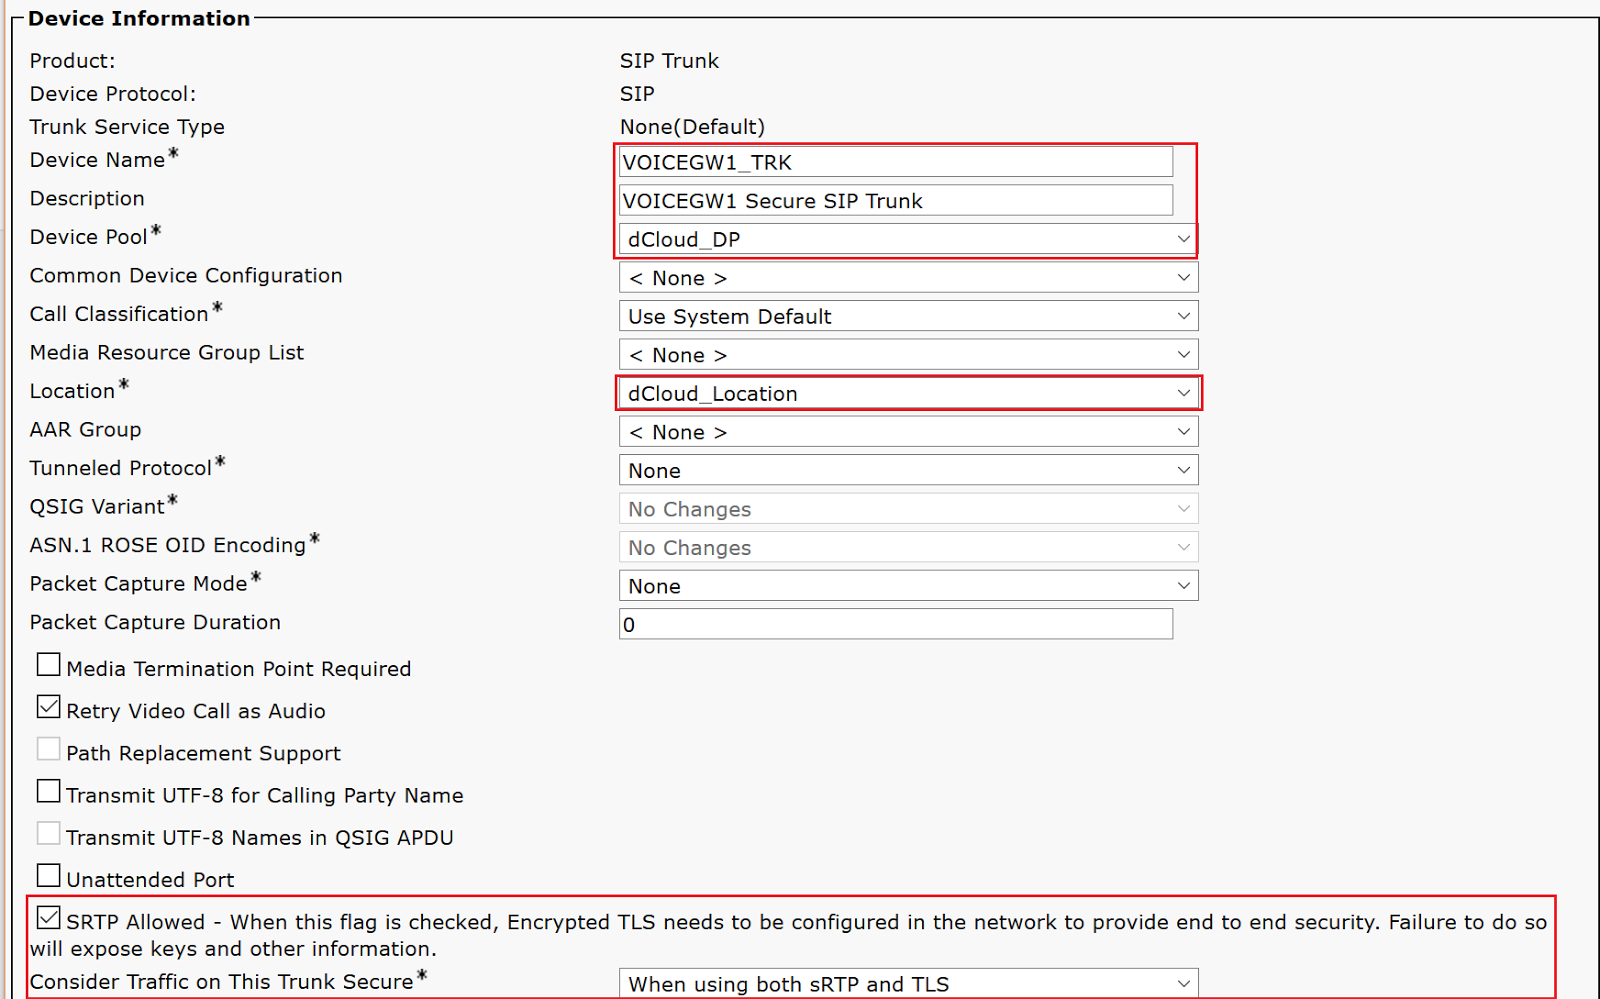
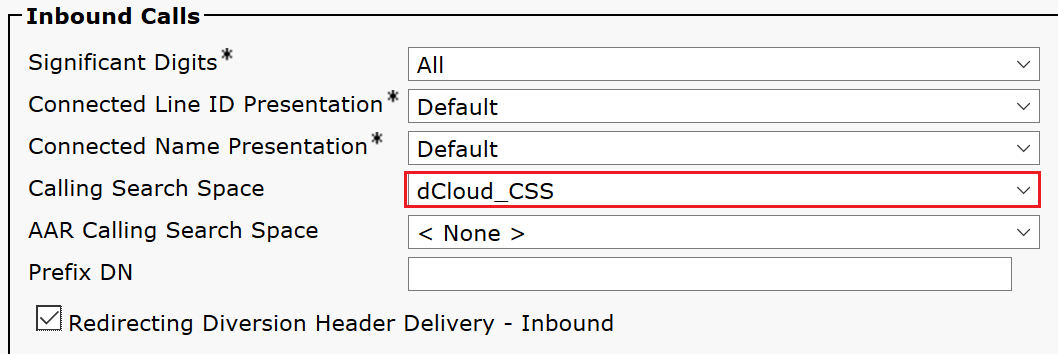
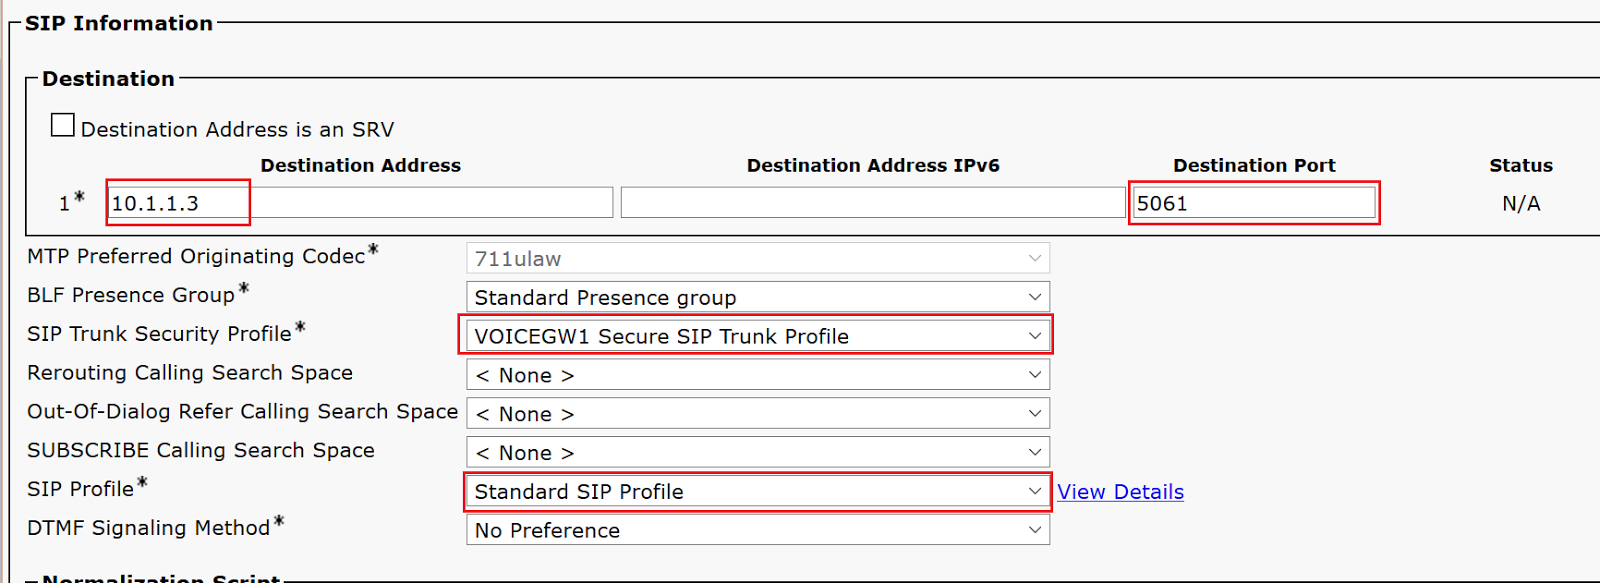
All of the default SIP Trunk Security Profiles in CUCM are for non-encrypted communcation, therefore it’s necessary to create a new SIP Trunk Security Profile. The X.509 Name in the specified Profile needs to match the Common Name presented by your Gateway certificate.
First go to CUCM Administration > System > Security > SIP Trunk Security Profile and choose Find to display all existing profiles. Next to the standard “Non-Secure SIP Trunk Security Profile” click the copy button.
Give the new profile a meaningful name that is specific to the Gateway you’re going to use it with. 
Select a Device Security Mode of Encrypted and ensure the Incoming / Outgoing Transport Type are TLS. Finally configure the X.509 Subject Name to be your Gateway’s FQDN and click Save.
If you want to use the same profile for multiple Gateways, you should be able to include each subsequent Gateway in the X.509 field separated by commas.

Create SIP Trunk

Now there are many things to consider when configuring a SIP Trunk, MGCP Gateway, etc. such as AAR, Calling Search Spaces. As the purpose of this article is simply to demonstrate SIP TLS configuration will be skipping over any specific configuration for this and assuming you know how to handle CSSs, digit manipulation, etc.
Browse to Device > Trunk and click Add New. Select SIP Trunk and leave the Trunk Service Type at the default value. Click Next.
Next enter the following details as a minimum:
You could optionally create a new SIP Profile for use with the Trunk. I typically do this and enable Options Ping so you can view the status of the Trunk from CUCM. Also if you  need to force early offer for any reason, you’ll definitely need to do that.
Providing all your certificate setup is complete, all you need to do is setup a route pattern and point it to the SIP Trunk (preferably via a Route List / Route Group) and another secure mode Phone to make and receive external calls with.

Gateway Configuration

First stage is to set the SIP Transport mode globally to TLS. If you only wish to enable this on individual dial-peers you can leave this out and configure everything on a specific voip dial-peer.
 voice service voip  
  ip address trusted list  
   ipv4 10.1.1.1 255.255.255.255  
   ipv4 10.1.1.2 255.255.255.255  
  srtp fallback  
  allow-connections sip to sip  
  sip  
   session transport tcp tls  
   srtp negotiate cisco  
Here I’ve also added some IPs to the trusted IP List. This isn’t absolutely necessary as long as you have a specific IP mentioned in a dial-peer they will get added to this automatically (not visible in the config though).

The srtp command alone forces all calls to use srtp. If you have some devices that are not capable of this (such as Cisco 7937 SCCP Conference stations) then you’re going to want to use the “srtp fallback”, that will allow the call to fallback to regular RTP.

Next you need to setup the sip-ua configuration to select which trustpoint you’ll use for SIP TLS.

 sip-ua  
  retry invite 3  
  timers trying 200  
  crypto signaling default trustpoint VOICEGW1 strict-cipher  

The “strict-cipher” forces all communication to use TLS. Again, if you want to only activate this on certain dial-peers, you can leave this out and configure directly on the dial-peer. Also in this config I adjust some timers to allow for faster failover if one CUCM node is down.

Lastly, is simply the VoIP dial-peer configuration.

You need an inbound dial-peer because the default inbound dial-peer has crappy settings by default (VAD on, g729 codec, h323, etc).

As you can see, I use my dial-peer towards the CUCM as full +E.164, because on the PSTN inbound dial-peer I would have translated any called numbers first to this format (see my other blog post https://paultursan.com/2016/08/sip-gateway-digit-manipulation-with-e-164-dial-plans-2/ regarding my reasons for this).

Note that the port you configure here for the outbound SIP dial-peers needs to match your SIP Trunk (and SIP Trunk Security Profile).

 dial-peer voice 3000 voip  
  description ## INBOUND SIP VOIP DIAL-PEER ##  
  session protocol sipv2  
  incoming called-number .  
  dtmf-relay rtp-nte sip-kpml  
  no vad
  codec g711ulaw  
 !  
 dial-peer voice 2000 voip  
  description ## SITE X DID RANGE TO CUCM1 ##  
  destination-pattern +61894445...  
  session protocol sipv2  
  session target ipv4:10.1.1.1:5061  
  dtmf-relay rtp-nte sip-kpml 
  no vad 
  codec g711ulaw  
 !  
 dial-peer voice 2001 voip  
  description ## SITE X DID RANGE TO CUCM2 ##  
  preference 1  
  destination-pattern +61894445...  
  session protocol sipv2  
  session target ipv4:10.1.1.2:5061  
  dtmf-relay rtp-nte sip-kpml  
  no vad
  codec g711ulaw  

And there you have it. You’ll just need to configure the rest of your dial-plan for PSTN side and on the CUCM side. Use “debug ccsip messages”  to see the inbound / outbound communication.

I hope this is helpful, as I know I had to dig in dozens of different articles to get all the necessary information. Cisco Support documentation has a habit now of making you go down the rabbit hole to perform any one simple task!

This Post Has One Comment

  1. Unknown

    This comment has been removed by the author.

Comments are closed.